Your WordPress site goes down mid-update during your busiest sales week. Visitors land on a cryptic default message, your agency client is calling, and you have no idea how long the site will be unavailable. This scenario plays out every day for businesses that haven’t taken control of WordPress maintenance mode. Understanding exactly what maintenance mode does, when it triggers, and how to manage it properly is the difference between a smooth five-minute update window and an hours-long scramble that costs you sales, credibility, and client trust. This guide gives you the full process, from preparation to troubleshooting, with actionable steps you can follow right now.
Table of Contents
- Understanding WP maintenance mode
- Preparing your site for safe maintenance
- How to enable, customize, and disable maintenance mode
- Troubleshooting stuck maintenance mode and reducing downtime risks
- Why reliable hosting is your secret weapon for stress-free maintenance
- Make WP maintenance a breeze with WP Tango
- Frequently asked questions
Key Takeaways
| Point | Details |
|---|---|
| Preparation prevents downtime | Backing up and notifying users minimizes risk before entering maintenance mode. |
| Choose the right method | Pick between plugins, core files, or server settings based on your site’s complexity and needs. |
| Reliable hosting matters | Managed WordPress hosting offers better performance and fewer stuck maintenance issues than shared plans. |
| Custom communications help | Use custom messages or branded pages to reassure visitors and clients during updates. |
Understanding WP maintenance mode
WordPress maintenance mode is not a setting you toggle manually by default. It activates automatically whenever WordPress runs a core, plugin, or theme update. The moment an update begins, WordPress drops a hidden file called ".maintenance` into your site’s root directory. That file is what triggers the maintenance screen visitors see. Once the update finishes successfully, WordPress deletes that file and your site returns to normal.
Here’s what your visitors actually experience during that window. WordPress serves a plain, unstyled page that reads “Briefly unavailable for scheduled maintenance. Check back in a minute.” There’s no branding, no countdown timer, and no reassurance that everything is fine. For a small business or agency site, that message can feel alarming to customers who have no context for what’s happening.
The technical side matters too. WordPress maintenance mode returns an HTTP 503 status code, which tells search engines the site is temporarily unavailable. A 503 is the correct signal because it instructs crawlers not to penalize the site for being down. However, if your site stays in maintenance mode for an extended period, search engines may begin to factor that into rankings. Speed matters here, not just for users but for SEO.
What triggers maintenance mode in common scenarios:
- Core WordPress version updates
- Plugin updates, especially bulk updates running simultaneously
- Theme updates that include database migrations
- Failed updates that leave the
.maintenancefile behind
Maintenance mode behavior at a glance:
| Situation | What happens | Business risk |
|---|---|---|
| Routine plugin update | 503 shown for seconds to minutes | Minimal if fast |
| Bulk plugin update | Longer exposure, higher failure risk | Moderate |
| Core version update | Extended downtime possible | High for active sites |
| Failed update | Stuck in maintenance indefinitely | Critical |
| Shared hosting under load | Slow execution, stuck mode likely | Very high |
For small to medium-sized businesses, even a few minutes of an unbranded 503 page can trigger support tickets, shopping cart abandonment, and client complaints. Agencies managing multiple sites multiply this risk across every account they handle. Partnering with managed WP hosting ensures your server resources stay stable during updates, drastically reducing the time your site spends in maintenance mode.

Preparing your site for safe maintenance
Having grasped how maintenance mode works, let’s ensure your site is fully prepared before diving in. Preparation is not optional. It is the single step most business owners skip, and the one that costs them the most when things go wrong.
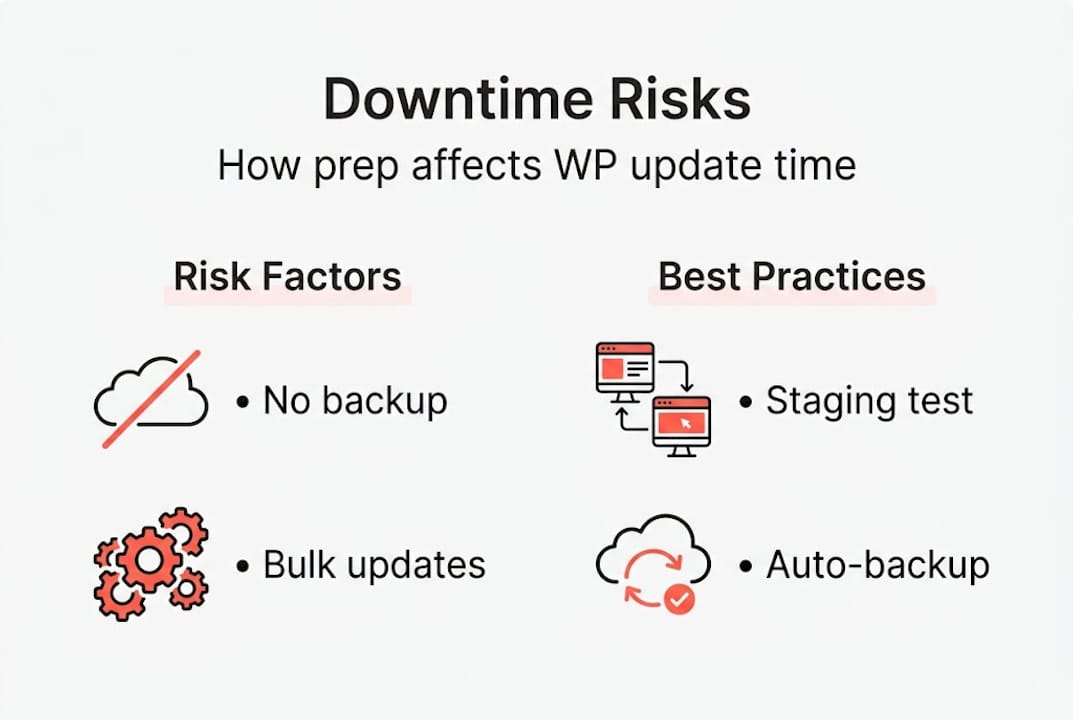
The core pre-maintenance checklist:
- Run a full site backup. Before any update, you need a verified, restorable backup. Not just a scheduled one that ran last night, but a fresh snapshot taken minutes before you start. Following solid backup best practices means your recovery window shrinks from hours to minutes if something breaks.
- Notify your team and clients. If you manage a site for a client, give them at least 24 hours notice. For internal teams, post in your Slack channel or project management tool. This prevents panic calls during the maintenance window.
- Schedule during off-peak hours. Use Google Analytics or your hosting dashboard to identify your lowest-traffic window. For most U.S. based businesses, this is between 2 a.m. and 5 a.m. local time.
- Spin up a staging environment. Test every update on a staging copy of your site before applying it to production. A staging site lets you catch conflicts and broken layouts without exposing your visitors to any disruption.
- Disable caching plugins temporarily. Cached pages can interfere with update processes and confuse visitors who see a stale version of your site after maintenance ends.
- Document your current plugin and theme versions. If you need to roll back, knowing exactly which version you were on speeds up recovery considerably.
Managed hosting platforms are purpose-built for this kind of workflow. WordPress hosting performance data shows that managed WP hosts like Kinsta achieve an average time to first byte (TTFB) of 182 milliseconds globally, and consistently outperform shared hosting during resource-heavy updates. That performance consistency is what keeps your maintenance window short and your update process reliable.
Auto-backups are one of the most underrated features of managed hosting. When your host takes automated snapshots before every update, you’re not relying on a manual step you might forget. Recovery speed drops from “rebuild from scratch” territory to a single-click restore. You can read more about how benefits of regular maintenance compound over time, especially when paired with consistent plugin update routines that reduce the risk of version conflicts.
Pro Tip: Never run bulk plugin updates on a live site without testing on staging first. Plugins that conflict mid-update can corrupt your database or break core site functionality, turning a two-minute task into a multi-hour recovery effort.
Preparation time vs. recovery time:
| Preparation level | Avg. update time | Avg. recovery time if failure |
|---|---|---|
| No preparation | 10 min | 4 to 8 hours |
| Backup only | 10 min | 1 to 2 hours |
| Backup and staging test | 10 min | Under 30 minutes |
| Full managed hosting workflow | 5 to 8 min | Under 10 minutes |
How to enable, customize, and disable maintenance mode
Once you’ve prepared, you’re ready to put your site into maintenance mode. Follow these step-by-step instructions for each approach.
Method 1: Let WordPress handle it automatically
For quick, single updates, just run the update through your WordPress dashboard. WordPress creates and removes the .maintenance file on its own. This works fine for simple scenarios, but you have zero control over the visitor experience or timing.
Method 2: Manual .maintenance file
- Connect to your server via FTP or your hosting file manager.
- Create a new file named
.maintenancein your WordPress root directory. - Add this single line to the file:
<?php $upgrading = time(); ?> - Save the file. Your site immediately enters maintenance mode.
- Perform your updates or changes.
- Delete the
.maintenancefile to bring the site back online.
Method 3: Custom maintenance.php page
For a branded experience, create a maintenance.php file inside your WordPress /wp-content/ directory. This file lets you display a fully styled HTML page with your logo, brand colors, and a friendly message. However, custom maintenance.php allows styled pages but cannot use WordPress functions like wp_head(), meaning you can’t pull in your theme’s stylesheet automatically. You’ll need to write inline CSS or link to external stylesheets manually.
Method 4: Maintenance mode plugins
Plugins like WP Maintenance Mode, LightStart, or Elementor’s built-in maintenance tools let you create beautiful, branded maintenance pages without touching a file. They inherit your theme environment and make customization accessible to non-developers. That said, plugins are easiest for SMBs but do add technical overhead to your site. For performance-critical sites where every millisecond counts, server-level or .htaccess methods are the leaner choice.
Customization considerations for agencies:
- Use your client’s logo and brand colors on the maintenance page
- Add an estimated return time so visitors don’t bounce permanently
- Include a contact email or phone number for urgent inquiries
- Consider a countdown timer for planned maintenance windows
- Add an email capture form to notify visitors when you’re back online
Disabling maintenance mode safely:
After your updates complete, verify the .maintenance file is gone from your root directory. Then clear your caching plugin, CDN cache, and browser cache before testing. Check your site from an incognito window to confirm visitors see the live site and not a stale cached version. Understanding website maintenance importance means following through on this final verification step every single time.
Pro Tip: After disabling maintenance mode, run a quick visual scan of your homepage, checkout flow, and any recently updated pages. Update-related CSS or JavaScript conflicts sometimes only appear after the maintenance window closes.
Troubleshooting stuck maintenance mode and reducing downtime risks
Even with careful execution, sites sometimes get stuck in maintenance, a major headache for businesses. Here’s how to fix it fast and prevent repeats.
Signs your site is stuck in maintenance mode:
- The “Briefly unavailable” message has been showing for more than 10 minutes
- Your WordPress dashboard is inaccessible or returns errors
- Users are reporting they can’t access the site hours after an update ran
- Your monitoring tool alerts you to a 503 status that won’t resolve
The fix is usually straightforward. Connect to your server via FTP, SFTP, or your hosting control panel’s file manager. Navigate to the WordPress root directory and look for the .maintenance file. Delete it. Your site should return to normal within seconds, assuming the underlying update completed successfully.
If the update itself failed, you may also see a broken site after removing the file. This is when your pre-maintenance backup becomes critical. Roll back to the snapshot you took before the update and troubleshoot the conflict on your staging site before trying again. For more complex failures, check out the full guide on fixing critical WordPress errors to diagnose database corruption, missing files, or plugin conflicts.
Why shared hosting increases your risk significantly:
“Low-resource shared hosting increases stuck mode risk; opt for managed WP hosting with high TTFB consistency for reliable updates.”
When dozens or hundreds of websites share the same server resources, your update competes with everyone else’s processes for CPU and memory. A plugin update that takes three seconds on a well-resourced managed server can take two minutes on crowded shared hosting. That extended window dramatically increases the chance that a timeout or resource limit kills the update process mid-execution, leaving your .maintenance file in place and your site stuck.
WordPress hosting performance benchmarks show that managed hosting handles 500 concurrent users at 320ms TTFB with zero errors, while budget shared hosts frequently fail under similar load. That stability during peak demand means your updates run faster and cleaner, with far less risk of incomplete executions.
What to do when updates fail at scale:
- Check your server error logs immediately after a failed update
- Restore from your pre-maintenance backup before attempting any fixes
- Identify which plugin or theme caused the conflict using your staging environment
- Contact your hosting support team if server-side resource limits caused the failure
- Consider splitting bulk updates into smaller batches to reduce load
For agencies running updates across many client sites, this risk scales linearly. One stuck site is a nuisance. Ten stuck sites simultaneously is a business-threatening event. Agency-focused managed hosting with dedicated resources, staging environments, and expert support is what separates agencies that scale confidently from those that dread update day.
Why reliable hosting is your secret weapon for stress-free maintenance
Here’s a perspective most maintenance guides won’t give you: the plugins, the .htaccess tweaks, the custom maintenance pages, they all matter, but they are secondary to one foundational choice. Your hosting environment is the variable that determines whether maintenance mode is a routine, forgettable event or a business emergency.
We’ve seen businesses invest in premium themes, conversion optimization tools, and elaborate backup plugins, then host their sites on the cheapest shared plan available. When update day arrives, slow server response turns a two-minute window into a 40-minute outage. The .maintenance file gets orphaned. The site goes down. The business owner spends their morning on the phone with a support team that has no insight into what happened.
Managed high-performance managed WordPress hosting changes this dynamic entirely. When your server has dedicated resources, NVMe storage, and server-grade CPUs with high single-core performance, updates execute fast. The .maintenance file appears and disappears so quickly that most visitors never see it. Stuck mode becomes a rare edge case rather than a regular occurrence. Auto-backups mean you always have a clean restore point. Staging environments mean you’ve already caught the conflict before it touches production. The cost of managed hosting pays for itself the first time it prevents a four-hour outage.
For agencies especially, this is not a luxury. It’s a competitive necessity. Clients judge you by uptime, not by how polished your maintenance page looks.
Make WP maintenance a breeze with WP Tango
Ready to avoid downtime headaches and take control? WP Tango’s managed WordPress hosting is built specifically for businesses and agencies that can’t afford to gamble on maintenance day.
WP Tango deliberately undersells server capacity so your site never competes for resources during updates. Every plan includes auto-backups, staging environments, and expert support from a team that knows WordPress deeply. Whether you need enterprise-grade WordPress hosting for a high-traffic business site, or are just getting started with affordable lite WordPress hosting, there’s a plan built for your needs. Explore WordPress maintenance plans and see how WP Tango makes reliable, stress-free maintenance the standard, not the exception.
Frequently asked questions
What does maintenance mode do in WordPress?
Maintenance mode temporarily shows a visitor notice and returns an HTTP 503 status so search engines know your site is updating and will return shortly without ranking penalties.
How do I customize the WordPress maintenance message?
You can build a custom maintenance.php page for a fully styled branded message, or use a plugin that integrates with your theme for easier, no-code customization.
Why does my site get stuck in maintenance mode?
Sites most often get stuck because shared hosting lacks resources to complete updates quickly; deleting the .maintenance file from your root directory typically restores access immediately.
Is using a plugin safe for WP maintenance mode?
Plugins are the most accessible option for most SMBs, but plugins add technical overhead that can slow performance-sensitive sites; server-level or .htaccess methods are leaner alternatives for high-traffic environments.